

Restoring Religious Statues: A Complete Guide
Table of Contents
- Damage Analysis: The First Step in Restoring Statues
- Restoration Supplies for Statues: What You Need
- Removing Paint from Plaster Statues: Step by Step
- Repairing Plaster Statues: Consolidation and Filling
- Retouching and Polychromy Restoration in Religious Statues
- Conservation and Protection After Restoration
- Preserving Authenticity and Historical Value
- Frequently Asked Questions
Last updated: September 1, 2026
Restoring religious statues is a specialized skill. A crack in a plaster statue of Mary, flaking polychromy on an antique crucifix, or a broken finger on a holy figure: each of these damages requires a different approach. This guide will walk you through the restoration process step-by-step, from damage analysis to conservation, so you can make informed decisions about what you can tackle yourself and when to call in a professional.
Below, you will also find a list of supplies for beginners, safety regulations that few other guides mention, and an honest answer to the question of when independent statue restoration ends and professional craftsmanship begins.
Damage Analysis: The First Step in Restoring Statues
Good restoration doesn't start with a brush, but with your eyes. Before you touch any material, you need to understand exactly what is damaged, why, and how severely.
Common Damages to Religious Statues
Religious statues are typically made of plaster, wood, terracotta, or a combination of materials. Each material has its own weaknesses:
- Plaster statues: cracks due to moisture fluctuations, broken protruding parts (fingers, crosses, attributes), flaking paint layers
- Wooden statues: woodworm infestation, deformation due to moisture, flaking polychromy
- Terracotta: fracture lines, chipped engobes, surface dirt
Damage to the support, the material from which the statue is constructed, is fundamentally different from surface damage. A crack that goes through the core requires consolidation before you even think about retouching. Surface dirt, such as dust, soot, or old varnish, is a different problem with a different solution.
Always take photos from all angles before you start. Documentation is not an unnecessary luxury: it helps you assess progress and reverse mistakes if necessary.
When to Engage a Professional Conservator
Independent statue restoration is realistic for minor surface damage. A professional conservator is necessary when:
- The statue has significant art-historical or monetary value
- Structural damage to the support is present that requires consolidation
- Polychromy is original and rare, where incorrect intervention causes irreversible damage
- Hazardous substances are present, such as lead white in historical pigments
Registered conservators in the Netherlands are affiliated with the Restauratoren Nederland professional association. For objects of particular historical value, a material-technical examination by a certified workshop is the only responsible choice.
Restoration Supplies for Statues: What You Need
The right materials make the difference between a lasting restoration and an intervention that needs to be redone in five years.
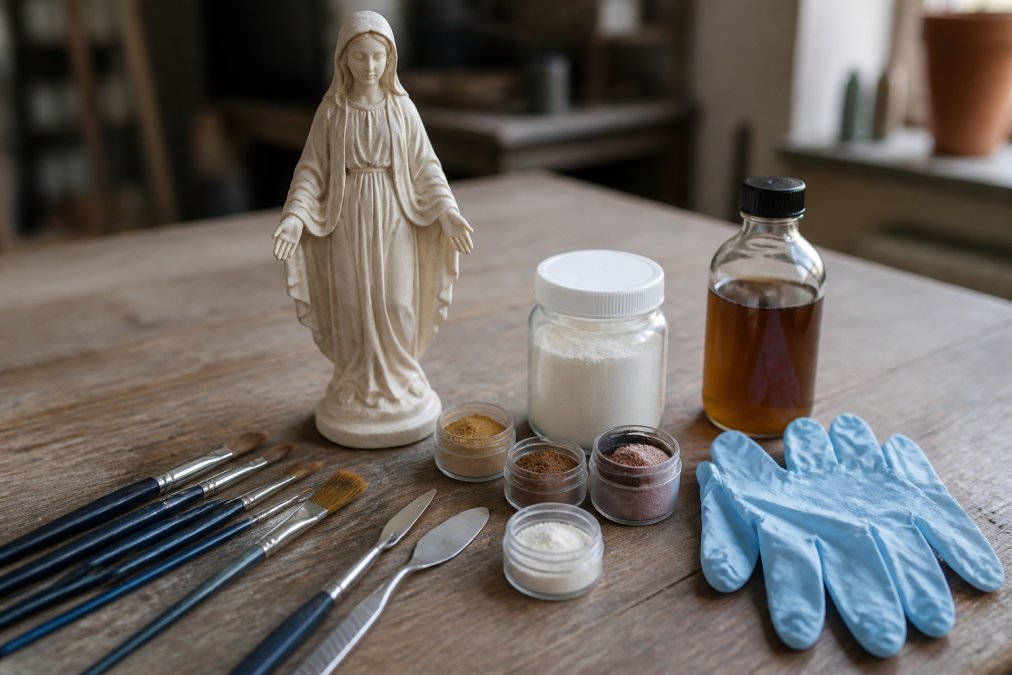
Basic supplies for beginners:
| Material | Application | Notes |
|---|---|---|
| Nitrile gloves | Personal protection | Always wear when cleaning and painting |
| Dust mask (FFP2) | Protection when sanding | Mandatory for plaster work |
| Fine brushes (size 0-4) | Retouching, applying varnish | Synthetic or kolinsky |
| Steel spatula / putty knife | Applying filler | Multiple sizes are useful |
| Plaster filler or Polyfilla | Filling small cracks and lacunae | Water-soluble, reversible |
| Dry pigments | Mixing color for retouching | Buy by color, not as a set |
| Binder (Paraloid B72) | Consolidation and varnish | Industry standard in conservation |
| Soft brush | Dust removal | Never brush too hard |
| Distilled water | Cleaning | Tap water contains lime |
| Dammar or microcrystalline wax | Final finishing | Protects surface |
Paraloid B72, dissolved in acetone or ethanol, is the industry standard for consolidation in professional workshops. It is reversible, meaning that future conservators can undo your intervention. This is a core principle of responsible conservation.
Safety Regulations for Restoration Work
Restoration work in a poorly ventilated area is more dangerous than most beginners realize. Acetone, ethanol, and turpentine evaporate quickly and are flammable. Plaster dust irritates the respiratory tract.
Concrete safety measures:
- Always work in a well-ventilated area or outdoors
- Wear an FFP2 dust mask for all sanding and mixing activities
- Use nitrile gloves, not latex (latex does not adequately protect against solvents)
- Store solvents in closed, original packaging away from heat sources
- Do not throw rags saturated with solvents into a closed trash can; let them dry outdoors before discarding them
According to the Arboportaal guidelines for hazardous substances, specific regulations apply to working with solvents in confined spaces, including for individuals working at home.
Removing Paint from Plaster Statues: Step by Step
Removing paint from plaster statues is the part of the restoration process that most often goes wrong. Aggressive sanding or overly strong solvents can irreversibly damage the support.
The most responsible method for beginners proceeds as follows:
Step 1: Cleaning (duration: 30-60 minutes)Remove loose dirt with a soft brush and distilled water. Use a cotton swab for small details. Let the statue dry completely, at least 24 hours at room temperature.
Step 2: Re-evaluate damage analysisAfter cleaning, damages previously hidden under dirt will become visible. Adjust your work plan.
Step 3: Consolidate loose paint layersApply diluted Paraloid B72 (approximately 5% in ethanol) under loose paint flakes with a fine brush. Gently press the flake with a cotton cloth. Let dry for 24 hours.
Step 4: Remove old paint layers (only if necessary)Use a wooden or bamboo stick to mechanically remove soft, loose paint. Chemical paint removers are rarely suitable for plaster statues: they penetrate the porous support and are difficult to neutralize. Always work in small areas of no more than 4 x 4 cm at a time.
Step 5: Assess surface treatmentBased on what you see, decide whether to proceed with filling or retouching directly.
What most guides don't mention: plaster is extremely porous and absorbs solvents quickly. What takes five minutes of working time on a wooden statue can go too far on plaster in thirty seconds. Always test in an inconspicuous area.
Repairing Plaster Statues: Consolidation and Filling
Repairing plaster statues requires patience. Consolidation, stabilizing the existing structure, always precedes filling.
Repairing Cracks and Broken Parts
A crack in plaster that is not stabilized will continue to grow. First, apply diluted Paraloid B72 along the entire crack line, on both sides. Let dry completely.
For filling lacunae (missing pieces), several fillers are available:
- Plaster filler (Polyfilla Fine Surface): good for small lacunae up to approximately 5 mm deep, easy to sand, reversible with water
- Plaster mortar (homemade mixture): for larger lacunae, but requires experience to achieve the correct consistency
- Epoxy paste: strong, but not reversible, only for structural repairs where strength is required
Broken parts, such as a finger or a cross, can be reattached with a conservation-appropriate adhesive like Beva 371 or a diluted Paraloid B72 solution. Avoid superglue: it is not reversible and can cause discoloration.
Always allow filler to fully cure before sanding. Sand with fine sandpaper (grit 320 or finer) and use light, circular motions. The goal is a flat surface that blends with the original, not a perfectly smooth surface that stands out.
Retouching and Polychromy Restoration in Religious Statues
Retouching is the most visible and technically demanding part of statue restoration. The goal is not perfection, but harmony: the lacuna should not stand out, but it also doesn't need to be perfectly hidden.
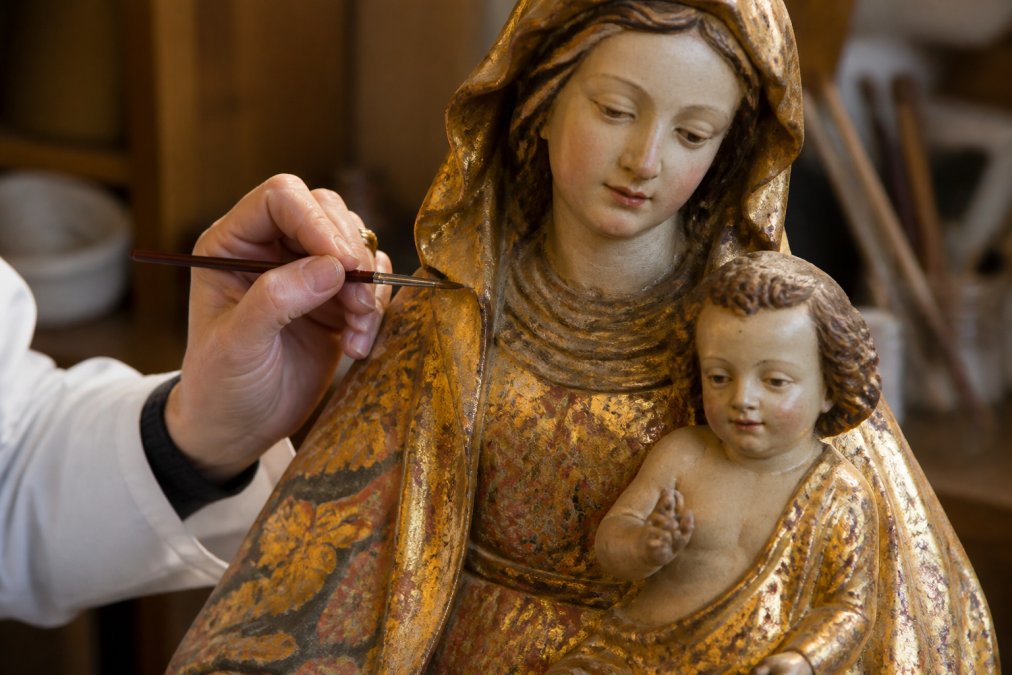
Always work from light to dark. Start with a base layer that is slightly lighter than the surrounding area and build up the color in thin layers. This way, you maintain control and can adjust as needed.
Choosing Pigments and Binders
The choice of pigments and binders determines how durable your retouching is and whether it aesthetically matches the original.
Binders for retouching:
- Watercolors (aquarelle or gouache): easy to remove, good for temporary retouching or as a first layer
- Paraloid B72 as a binder with dry pigments: the professional choice, reversible and color-stable
- Egg tempera: historically authentic, but requires experience in preparation
Avoid acrylic paint for restoration purposes. Acrylic adheres strongly, is difficult to remove, and has different reflective properties than historical paint layers. On an antique statue with authentic polychromy, acrylic retouching will immediately stand out under raking or UV light.
Dry pigments offer the most flexibility. You can mix until you achieve the exact tone that matches the original. For the historical accuracy of pigments, consult resources such as the RCE documentation on historical pigments and paint layers, which provides guidelines for restorers of heritage objects.
After retouching, apply a final layer of varnish. Dammar varnish gives a slight sheen that matches historical objects. Microcrystalline wax provides a matte finish and extra protection. Choose based on the original surface.
Conservation and protection after restoration
A successful restoration is only complete when the statue is protected against new damage. Conservation is not a one-time act but an ongoing process.
The main enemies of religious statues are moisture, direct sunlight, temperature fluctuations, and mechanical shocks. Practical measures:
- Store or display the statue in a stable location without direct sunlight. UV light discolors pigments and varnish quickly.
- Maintain a stable relative humidity between 45 and 55 percent. Large fluctuations cause expansion and contraction of the support, leading to new cracks.
- Clean the statue annually with a soft brush. Never dust wet unless the surface is protected with varnish or wax.
- Apply a thin layer of microcrystalline wax every two to three years if the statue is not behind glass.
For objects of particular historical value, the Institute for Collection Netherlands for preventive conservation refers to specific guidelines for storage conditions of polychrome objects.
Document your restoration completely: date, materials used, concentrations, and methods. Keep this with the object. Future restorers, or yourself ten years from now, will be grateful.
Preserving authenticity and historical value
The biggest pitfall when restoring religious statues yourself is the tendency to do too much. A statue that looks new after restoration has lost its authenticity. The patina, the traces of time and use, are part of its historical value.
Restoration is not renovation. The goal is to stabilize and conserve, not to reconstruct to a presumed original state that you can never know exactly.
What this means in practice:
- Only fill gaps that are aesthetically disturbing or weaken the structure
- Retouch minimally: apply color so the gap is not noticeable, but do not create a perfect copy of the original
- Preserve the original surface as much as possible, even if it means small imperfections remain visible
- Do not use modern materials that visually deviate from the historical character of the object
A replica is a different object than a restored original. Someone who buys an old religious statue for its authentic character also buys the traces of its history. Those traces are not a defect that needs to be repaired.
At Chez Monique's 2e Leven, we select objects precisely for their authentic character and historical value. A well-conserved old statue with visible patina tells a story that a perfectly restored replica can never tell.
Summary: restoration process in steps
| Step | Action | Key point |
|---|---|---|
| 1. Damage analysis | Document, photograph, inventory damage | No intervention without analysis |
| 2. Cleaning | Soft brush, distilled water, cotton swab | Always allow to dry completely |
| 3. Consolidation | Paraloid B72 under loose paint flakes | Ensure reversibility |
| 4. Filling | Gypsum filler or gypsum mortar for lacunae | Harden before sanding |
| 5. Retouching | Dry pigments with reversible binder | Work from light to dark |
| 6. Conservation | Varnish or wax, stable storage conditions | Inspect annually |
Restoring religious statues requires patience, the right materials, and respect for the object's historical value. Small surface damages can be tackled well with the steps in this guide. However, when structural damage or rare polychromy is involved, a certified conservator is the only responsible choice. At Chez Monique's 2e Leven, we offer a carefully selected collection of antique religious statues and devotional objects, each checked for condition and authenticity. Give a special object a second life in your interior and discover our offerings.
Frequently Asked Questions
What materials do I need for restoring religious statues?
For restoring religious statues, you will need at least: fine sandpaper (grits 220 and 400), a consolidant such as Paraloid B-72, a suitable gypsum-based filler, fine brushes for retouching, pigments matched to the original polychromy, a matte or glossy varnish as a finishing layer, and protective gloves. The exact materials you need depend on the statue's material and the nature of the damage.
How do I remove old paint layers from an antique statue?
Removing paint from plaster statues requires caution. Never use aggressive solvents on untreated plaster. Start with mechanical cleaning using a soft brush or wooden spatula. For stubborn paint layers, you can try a cotton swab with distilled water or a weak solvent like ethanol on a small, inconspicuous test area. Allow the surface to dry completely before proceeding. If in doubt about the historical value of the paint layer, professional advice is recommended.
What is the difference between restoration and conservation?
Restoration means returning a religious statue to a previous state: repairing damage, reconstructing missing parts, and retouching the polychromy. Conservation focuses on stopping further deterioration without significantly altering the current condition. Conservation aims to preserve as much of the patina and historical value as possible. For antique devotional objects, conservation is often the preferred approach, unless the statue is severely damaged and functional or aesthetic repair is necessary.
When is it advisable to engage a professional conservator?
Engage a professional conservator if the statue has major structural damage, if the polychromy is extensively damaged, or if it is an art-historically valuable sculpture. Professional advice is also recommended for unknown materials, severe mold growth, or if you are unsure about the correct approach. For small superficial repairs to simpler plaster statues, you can proceed yourself with the right materials and caution.
This article was written using GrandRanker